 Save
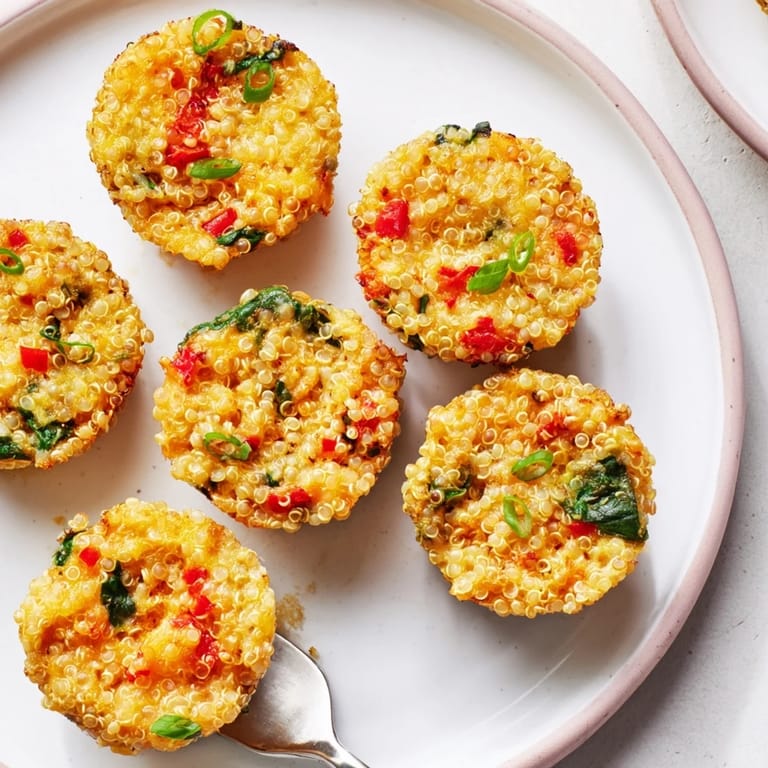
Save I discovered these little golden bites completely by accident one Tuesday morning when I had leftover quinoa and a block of sharp cheddar staring at me from the fridge. My daughter had asked for something she could grab before soccer practice, and I didn't want to default to store-bought granola bars again. The first batch came out of the oven looking almost too perfect, and she ate four of them before even asking what was in them, which felt like the ultimate compliment.
I made these for a book club potluck thinking they'd be a nice vegetarian option, and they became the first thing people reached for, even before the elaborate desserts someone spent three hours on. One friend asked for the recipe right there, napkin in hand, and I realized I'd stumbled onto something genuinely crave-worthy.
Ingredients
- Cooked quinoa: Use it cooled so it binds properly without turning mushy; warm quinoa won't hold together well.
- Sharp cheddar cheese: The sharper the better—it gives these bites real personality and doesn't get lost in the mix.
- Eggs: These are your binder, so don't skip them or swap them out unless you have a backup plan.
- Baby spinach: Finely chop it so it distributes evenly; kale or zucchini work beautifully as swaps.
- Red bell pepper: Diced small adds sweetness and color without overpowering the savory cheese.
- Green onions: They bring a fresh brightness that keeps these from feeling heavy.
- Garlic: Just one clove minced fine—it's a supporting player, not the lead.
- Breadcrumbs: They add structure and help everything hold together; gluten-free works just as well.
- Smoked paprika: A small amount goes a long way toward making these taste sophisticated.
Tired of Takeout? 🥡
Get 10 meals you can make faster than delivery arrives. Seriously.
One email. No spam. Unsubscribe anytime.
Instructions
- Get your oven ready:
- Preheat to 375°F and grease a mini muffin tin—using paper liners makes cleanup almost painless and the bites pop out easily.
- Combine your base:
- In a large bowl, mix the cooled quinoa, shredded cheddar, eggs, spinach, bell pepper, green onions, and garlic until everything is distributed evenly. The warmth from the cheese should help things come together.
- Season and finish mixing:
- Stir in breadcrumbs, salt, pepper, oregano, and smoked paprika, mixing thoroughly until the texture is consistent throughout and smells absolutely irresistible.
- Fill the tin:
- Spoon the mixture evenly into each cup, pressing down gently so each bite is compact enough to hold together but not so hard that it becomes dense. The mixture should feel like it's been hugged, not squeezed.
- Bake until golden:
- Bake for 20–25 minutes until the tops are golden brown and they feel set when you touch them gently. The kitchen will smell amazing around the 15-minute mark.
- Cool and serve:
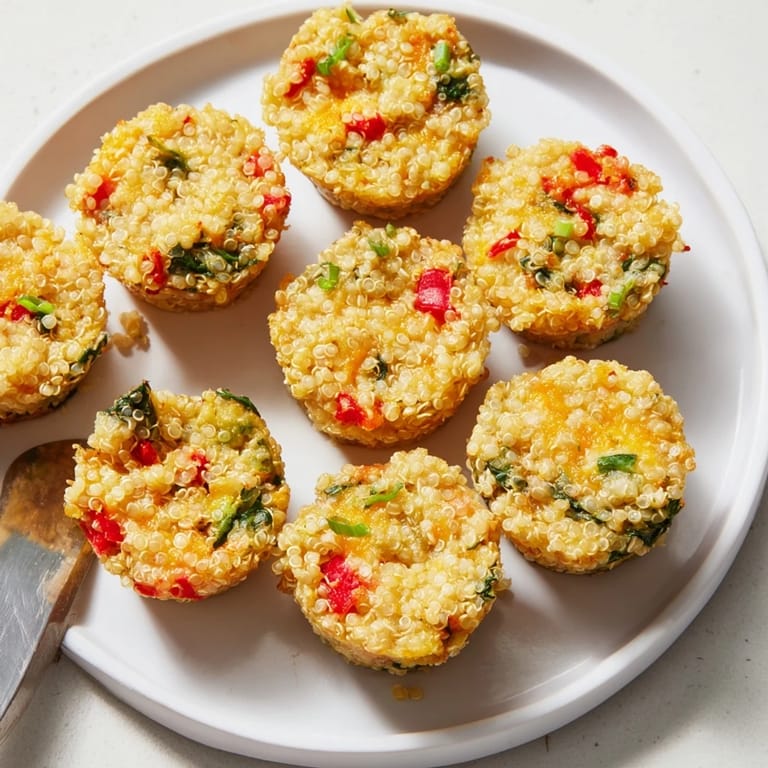
- Let them rest in the pan for 5 minutes—this helps them firm up—then transfer to a wire rack. They're delicious warm, room temperature, or even cold straight from the fridge.
 Save
Save My neighbor came over while I was baking these and stayed for tea, and we ended up trading recipes for twenty minutes over a warm bite with a little Greek yogurt dollop. That moment made me realize food isn't just about feeding people; it's about creating reasons to slow down together.
Make Them Your Own
The beauty of this recipe is how flexible it is—I've made them with Monterey Jack when cheddar was picked over, added minced jalapeño for heat, and swapped in grated zucchini when I had too much garden produce. Each version tastes different enough to feel new, but they always hold together and taste genuinely good. The seasonings are your playground too; if you love smoked paprika like I do, that's the place to be bold.
Serving and Storing
Serve these warm from the oven or at room temperature—I've never had leftover bites stay around long enough to develop a preference. They're perfect alongside soup for lunch, as part of a snack board for entertaining, or just grabbing straight from a container in the fridge when you need something fast. These actually freeze beautifully, which is something I didn't expect but now rely on completely.
Small Details That Matter
The smoked paprika isn't just decoration—it adds a subtle warmth that makes people wonder what the secret ingredient is, and you get to smile mysteriously. If you have Parmesan hanging around, stirring in two tablespoons adds a salty depth that elevates these from good to craveable. Line your muffin tin with papers if you can, because these bites deserve a graceful exit.
- Always use cooled quinoa or they'll turn mushy and fall apart.
- Don't skip the 5-minute cool-down in the pan—it's what makes them sturdy enough to move.
- Serve with something creamy like Greek yogurt, salsa, or marinara and watch people come back for more.
 Save
Save These bites have become my quiet answer to the constant question of what to feed hungry people who aren't sure what they want. They're proof that simple ingredients and a little intention can turn into something people actually look forward to eating.
Recipe FAQs
- → Can I use other cheeses instead of sharp cheddar?
Yes, Monterey Jack, Swiss, or dairy-free cheese alternatives work well and provide different flavor profiles.
- → Are these bites suitable for gluten-free diets?
Using gluten-free breadcrumbs ensures these bites remain gluten-free and safe for those with sensitivities.
- → How should I store and reheat the bites?
Store in an airtight container in the fridge for several days or freeze for longer. Reheat in a toaster oven or conventional oven to keep them crisp.
- → Can I add other vegetables to the mixture?
Yes, finely diced zucchini, kale, or other mild greens can be added to enhance flavor and nutrition.
- → What dips pair well with these quinoa bites?
Greek yogurt dip, salsa, or marinara sauce complement the savory flavors and add moisture.